How to Move from Google Sheets to QuickBooks Online Without Losing Data
Plenty of small businesses start their books in a spreadsheet, and Google Sheets can genuinely work for the first year or two. The trouble starts when you need real financial reports, multiple people entering data at once, or a proper audit trail. If you’re ready to move from Google Sheets to QuickBooks Online, the migration itself is straightforward, but the order you do things in determines whether your historical data survives the move intact.
This guide walks through preparing your spreadsheet, the correct import sequence, and the mistakes that quietly cause data loss during a spreadsheet-to-QuickBooks migration.
Why Spreadsheets Eventually Break Down
Google Sheets has no built-in double-entry logic, no audit trail showing who changed what, and no automatic bank feed. Formulas break silently when someone edits the wrong cell. None of this matters much at low transaction volume. It becomes a real risk once you’re relying on the numbers for tax filings, loan applications, or decisions about hiring and spending.
Step 1: Prepare Your Spreadsheet Before You Import Anything
QuickBooks Online’s native import tool connects directly to Google Sheets, but it expects clean, consistently formatted data. Fix these issues before you touch the import screen:
- One data type per sheet. Keep your chart of accounts, customer list, vendor list, and products/services on separate sheets or in separate files. QuickBooks imports each data type individually.
- Convert formulas to values. A cell showing a formula result imports fine, but a broken formula reference can import as blank or as an error string. Paste values only before uploading.
- Remove merged cells and blank header rows. QuickBooks reads the first row as column headers, so keep that row clean and put your actual data starting on row two.
- Flatten sub-accounts in your chart of accounts. QuickBooks Online’s native chart of accounts import doesn’t support importing parent-child relationships directly. Import accounts as flat, top-level accounts first, then reorganize into sub-accounts manually inside QuickBooks afterward.
- Standardize names. Decide now whether a vendor is “ABC Plumbing” or “ABC Plumbing Inc.,” and make sure every row uses the same spelling. Inconsistent naming creates duplicate records once imported.
Not confident your spreadsheet is import-ready?
We help businesses across the US, UK, Canada, Australia, and the GCC move from Google Sheets to QuickBooks Online without losing historical data.
Request a Bookkeeping ConsultationStep 2: Import in the Right Order
Importing data out of sequence is one of the most common reasons a move from Google Sheets to QuickBooks Online goes sideways. Follow this order:
- Chart of accounts. Every other import references an account, so this needs to exist first.
- Customers and vendors. Invoices and bills need a customer or vendor to attach to, so these come next.
- Products and services. Line items on invoices and bills reference this list.
- Opening balances. Set your starting balances as of your cutover date before bringing in historical transactions.
- Historical invoices, bills, and transactions. Import these last, once every account, customer, vendor, and item they reference already exists.
Step 3: Import Your Chart of Accounts
Go to Settings → Import Data and select Chart of Accounts. Download the sample file QuickBooks provides and match your spreadsheet’s columns to it exactly: account name, account type, detail type, and account number. Select Connect to sign in to Google and pick the correct sheet, or upload an Excel or CSV file directly. Confirm the account type mapping on the preview screen before finalizing. An account mapped to the wrong type will misclassify every transaction posted to it later.
Step 4: Import Customers, Vendors, and Products/Services
Using the same Import Data screen, repeat the process for customers, vendors, and products/services. QuickBooks limits each import to 2MB or 1,000 rows, according to Intuit’s own import documentation. Split larger lists into multiple files rather than forcing one oversized import through. On the mapping screen, match each spreadsheet column to its QuickBooks field, and select “No Match” for any column without a corresponding field instead of forcing a mismatch.
Step 5: Bring in Historical Transactions
QuickBooks Online’s Import Data tool can bring in invoices and bills from a CSV file, in addition to your lists. For historical bank and credit card activity, use a separate process: go to your bank account under Transactions → Bank transactions, select Upload transactions, and upload a CSV, QBO, or OFX file of your historical activity. This process sits apart from the general Import Data screen and handles a different kind of data.
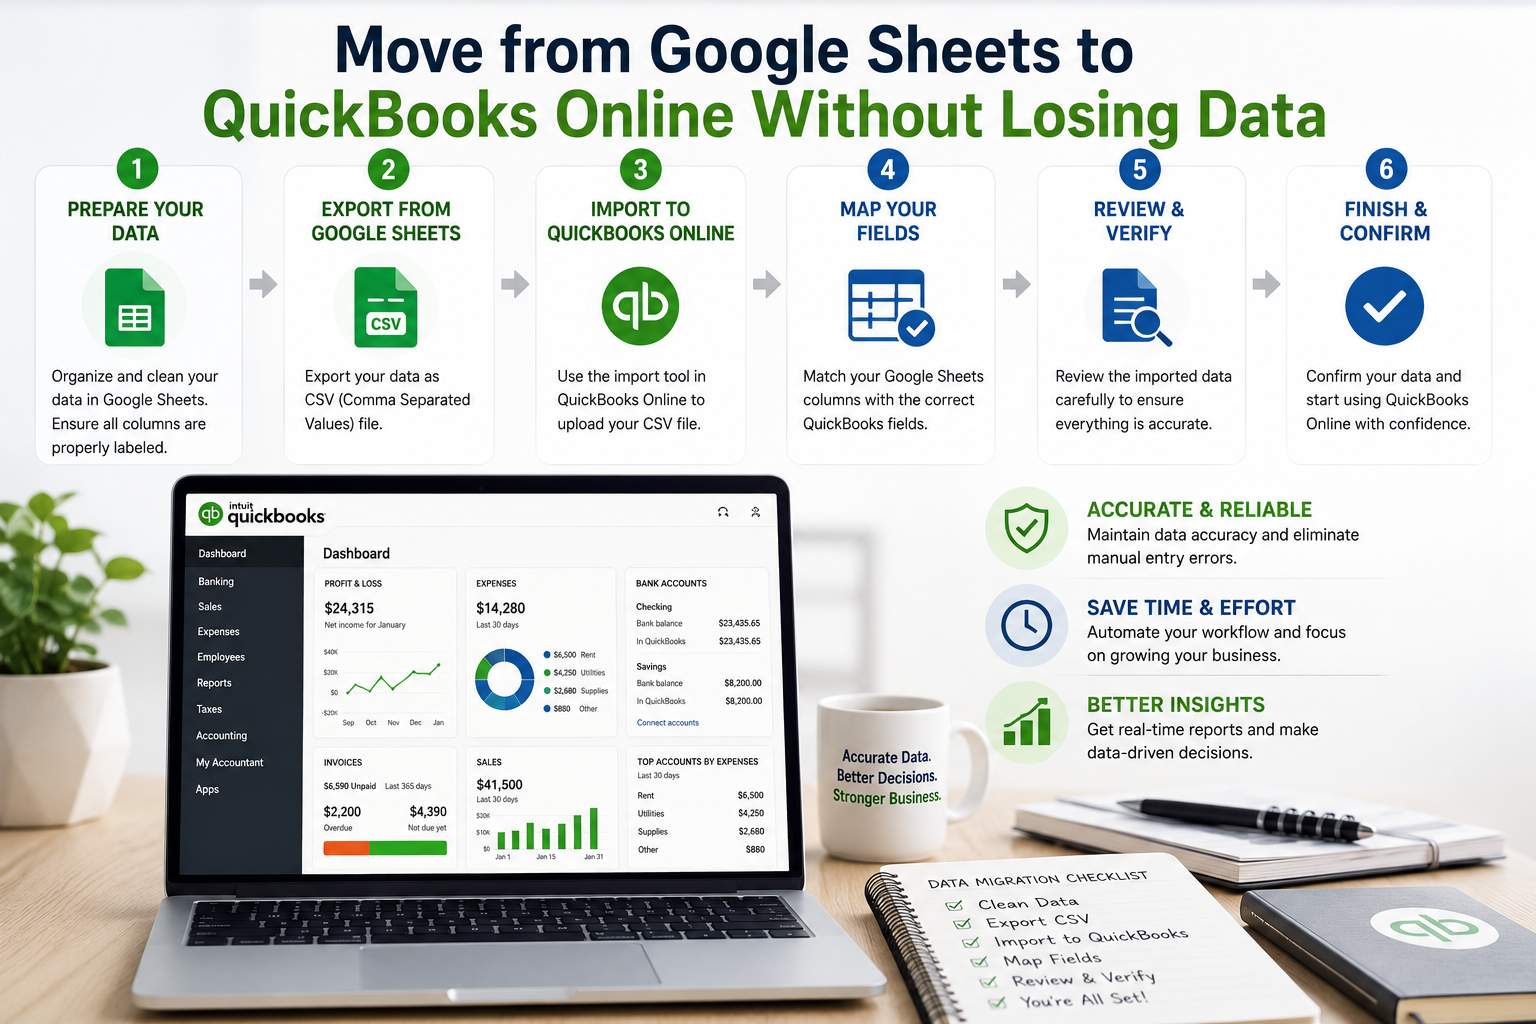
The correct sequence for a Google Sheets to QuickBooks Online migration.
Common Ways Data Gets Lost During Migration
| Mistake | Why It’s a Problem | Fix |
|---|---|---|
| Importing transactions before the chart of accounts exists | Transactions can’t attach to accounts that don’t exist yet, causing failed or miscategorized imports | Always import the chart of accounts first |
| Leaving formulas active instead of pasting values | Broken cell references import as blank fields or error text | Copy and paste as values before uploading any sheet |
| Inconsistent customer or vendor naming | Creates duplicate records that split your transaction history across two profiles | Standardize every name in your spreadsheet before importing |
| Assuming sub-accounts import automatically | QuickBooks Online’s native import doesn’t preserve account hierarchy | Import flat accounts, then rebuild the hierarchy inside QuickBooks |
| Not verifying totals after each import stage | Small errors compound and get harder to trace the further you get into the migration | Check totals against your spreadsheet after each import step, not just at the end |
Already migrated and worried something’s off?
We’ll review your QuickBooks Online setup against your original spreadsheet and fix any gaps from the migration.
Get a Free ConsultationStep 6: Verify Nothing Was Lost
Once every import finishes, compare the results against your original spreadsheet before you consider the migration complete:
- Count your customer, vendor, and product/service records in QuickBooks and compare them to your spreadsheet row counts.
- Check your chart of accounts for any accounts that imported under the wrong account type.
- Spot-check a handful of individual customer and vendor records for accurate contact details and balances.
- Run a trial balance in QuickBooks and compare it against your spreadsheet’s totals as of your cutover date.
When to Bring in a Bookkeeper
A clean spreadsheet with a few dozen customers and a simple chart of accounts migrates smoothly in an afternoon. Years of transaction history, messy naming conventions, or a spreadsheet that’s grown organically without much structure make the move riskier to do alone.
GlobalBookkeepingExperts.com helps businesses move from Google Sheets to QuickBooks Online, Xero, or Zoho Books, and verifies that historical data transfers accurately before considering the migration complete.
Frequently Asked Questions
Can I connect Google Sheets directly to QuickBooks Online for import?
Yes. QuickBooks Online’s Import Data screen lets you sign in to Google and select a sheet directly, in addition to uploading an Excel or CSV file.
Is there a limit to how much data I can import at once?
Customer and vendor imports are limited to 2MB or 1,000 rows per file. Split larger lists into multiple imports rather than trying to force one large file through.
Will my sub-accounts import correctly?
Not automatically. QuickBooks Online’s native chart of accounts import doesn’t preserve parent-child relationships. Import accounts as flat, top-level entries first, then rebuild your sub-account structure inside QuickBooks.
Do I need to import every historical transaction?
Not necessarily. Many businesses import accurate opening balances as of a cutover date and start live tracking from there, rather than migrating years of detailed transaction history line by line.
What should I do if numbers don’t match after the import?
Check the import order first, since transactions imported before their related accounts, customers, or vendors existed often import incorrectly. Compare your trial balance against your original spreadsheet to isolate the discrepancy.
Conclusion
A successful move from Google Sheets to QuickBooks Online depends more on sequence and preparation than on the actual click-by-click import process. Clean your data, import in the right order, and verify totals at each stage. You’ll land in QuickBooks with your historical numbers intact and a much sturdier system going forward.
Let us handle your migration for you
From spreadsheet cleanup through verified data import, GlobalBookkeepingExperts.com moves your books into QuickBooks Online accurately.
Talk to a Bookkeeping Specialist